Choosing the Right Paver Edging Options for Your Project
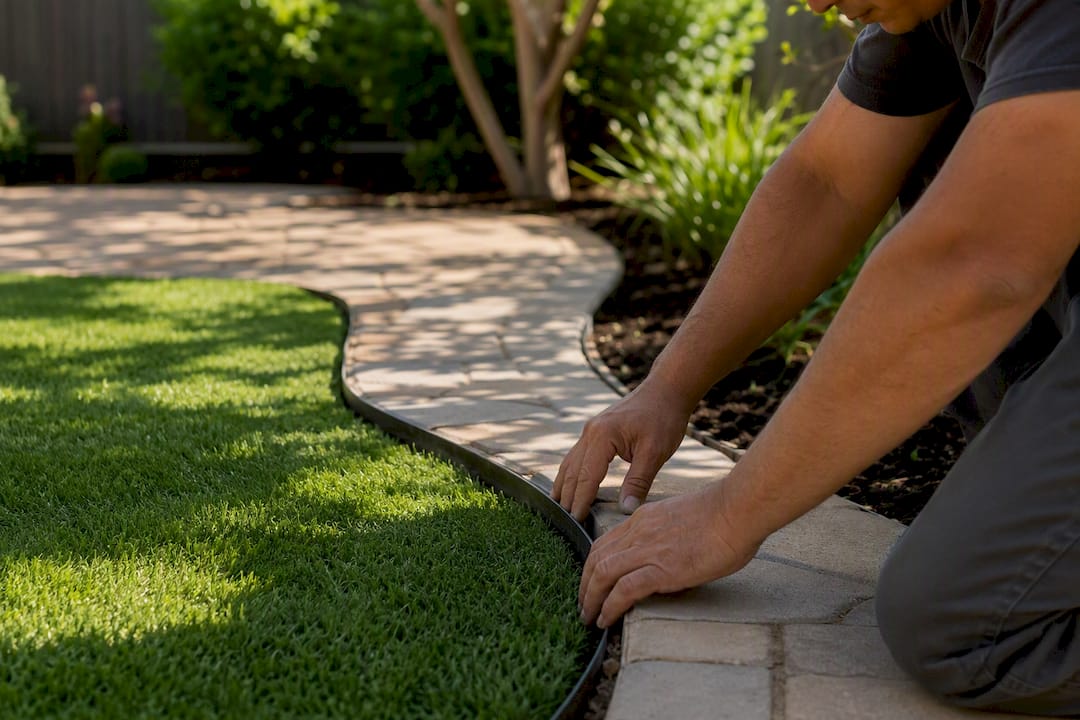
For patios and walkways, plastic or aluminum edge restraints handle most jobs when they’re anchored properly. Driveways need something stiffer, like reinforced concrete curbs or heavy-duty metal set into the base. Permeable paver systems demand rigid restraints tied directly into the aggregate base, and any decorative border, like a soldier course of brick, still needs a structural restraint hiding behind it.
Here’s the rule that governs every choice you make: pick the stiffest restraint your site’s lateral loads actually require. A quiet backyard patio doesn’t need what a driveway needs, and a driveway that sees a snowplow every winter doesn’t need what a garden path needs. Get the load right, and the material choice gets a lot easier.
- Patios and walkways: plastic or aluminum, well-anchored
- Driveways and permeable systems: concrete curbs or heavy-duty metal
- Decorative borders: always backed by a hidden structural restraint
Pro Tip: Never substitute flat landscape edging for a real paver restraint. It’s a common shortcut that looks fine for a season and fails within a year or two. Stakes also need to reach the compacted base, not just the soil beneath it, or the whole system starts drifting the first time it freezes.
Key Takeaways
The single most reliable predictor of edging failure isn’t the material you choose, it’s whether the restraint is anchored into the compacted base rather than the bedding sand or topsoil above it.
| Point | Details |
|---|---|
| Match stiffness to load | Plastic and aluminum suit patios and walkways; concrete or heavy metal suit driveways and permeable systems. |
| Stake into the base | Spikes should reach the compacted aggregate base, with 8 to 12 inch spacing typical for plastic and aluminum. |
| Never install on bedding sand | Restraints set on bedding rather than base settle unevenly and fail early. |
| Watch for creep after freeze-thaw | Annual and post-storm inspections catch small movement before it becomes a full replacement. |
| Get professional help for driveways and permeable projects | Pave-n-turf installs pavers and decorative rock across driveways, patios, and walkways in the Dallas-Fort Worth and Austin areas when the project calls for concrete curbs or base-tied permeable restraints. |
Table of Contents
- Paver Edging Options and Why They Actually Matter
- Comparing Types of Paver Edging Materials
- Matching Paver Border Ideas to Your Actual Use Case
- Installation Rules That Actually Determine How Long Edging Lasts
- Common Installation Mistakes and When Repairs Are Enough
- Field Experience Behind This Guide
- How Sustainable Is Each Paver Edging Material
- Edging and Drainage: Getting Water Management Right
- Tools You’ll Need for Each Edging Installation
- What This Guide Gets Right That Most Advice Skips
- Get Professional Paver Edging Installed by Pave-n-turf
- Sources
- FAQ
Paver Edging Options and Why They Actually Matter
Edge restraints aren’t cosmetic trim. They hold the joint spacing that lets pavers share load with their neighbors, and without that spacing intact, the whole system starts working against itself.
Interlocking pavers rely on tight, sand-filled joints, typically in the 2–4 mm range, to transfer weight sideways instead of letting one paver absorb it alone. Edge restraints keep that spacing locked in place by stopping the outer row from creeping outward under repeated foot traffic, tire loads, or seasonal ground movement. Once that outer row starts to drift, even by a fraction of an inch, the joints behind it widen too. Sand washes deeper into the gaps. Individual pavers start rocking instead of locking together.
The failure pattern is almost always the same: creep at the edge, then joint widening working inward, then spalling or cracking as pavers lose their neighbors’ support. It’s slow at first. You might not notice for a full season. Then one spring you’re staring at a walkway that looks like it’s been chewed at the corners.
- Structural restraints (plastic, metal, concrete) carry real lateral load
- Decorative borders (brick soldier courses, stone edging) are visual only and need a hidden restraint behind them
- Skipping either one invites the same slow failure, just on a different timeline
That distinction between structural and decorative matters more than most homeowners realize. A soldier course of pavers looks like an edge restraint, and it can function as a nice visual frame, but it’s not stiff enough on its own to stop lateral creep under real load. It needs a plastic, metal, or concrete restraint behind it doing the actual work.
Comparing Types of Paver Edging Materials
Every edging material trades off stiffness, cost, and installation effort differently, and knowing where each one sits on that spectrum saves you from picking the wrong tool for your project.
1. Plastic (HDPE/Poly) Edging
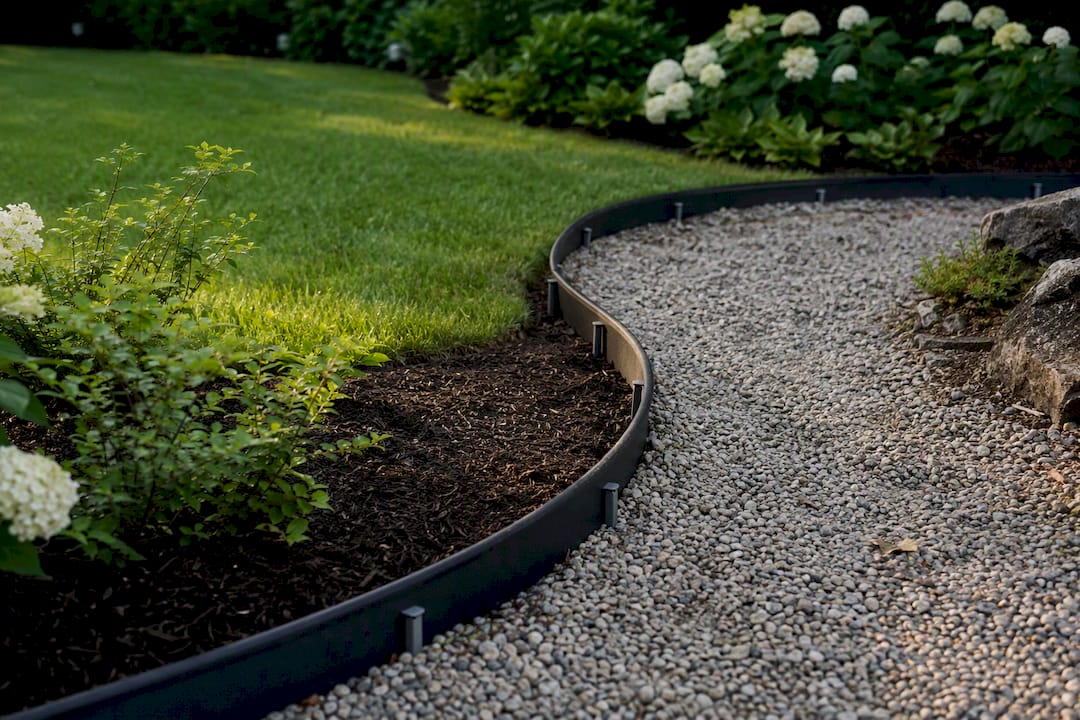
Plastic edging is the DIY favorite for good reason. It bends around curves, installs fast, and won’t rust or rot. Material costs run roughly $1 to $3 per linear foot, which makes it the cheapest structural option on this list. The catch: it’s noticeably less stiff than metal or concrete, so it’s best reserved for light residential and pedestrian applications rather than driveways or heavy vehicle areas. Get the spike spacing right and anchor it into real base material, not just topsoil, and it holds up fine for patios, garden paths, and low-traffic walkways.
2. Aluminum Edging
Aluminum splits the difference between plastic’s flexibility and steel’s rigidity. It holds a low profile that disappears visually once mulch or grass grows against it, resists corrosion far better than untreated steel, and bends into tight curves without kinking. Costs typically land between $4 and $8 per linear foot. Some hybrid aluminum systems use wider stakes that capture more surrounding base material and resist lateral movement better than narrow-stake versions, which matters if your soil is loose or your site sees higher foot traffic than average.
3. Galvanized Steel Edging
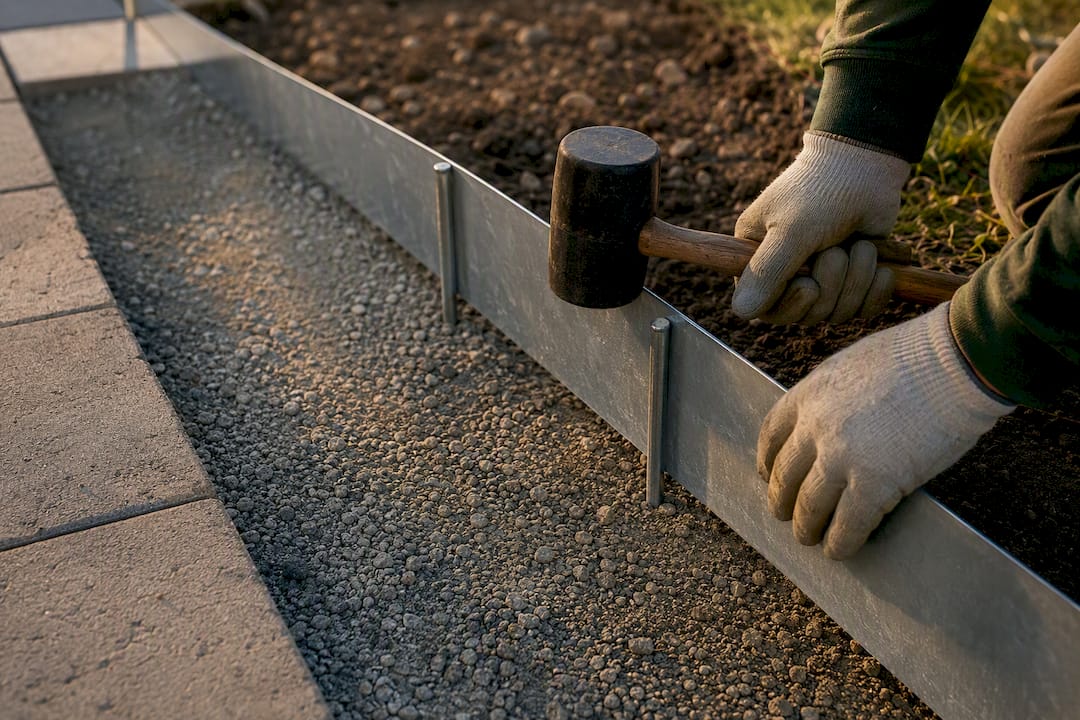
Steel is the strong, straight-line specialist. It handles vehicular loads on long, straight runs better than aluminum or plastic, and it holds a crisp line for formal patio geometry or driveway borders. Pricing runs about $5 to $10 per linear foot. The trade-off is flexibility: steel resists bending into curves, and uncoated or poorly galvanized sections can corrode over time, especially in wet climates or near sprinkler zones.
4. Poured-in-Place and Precast Concrete Curbs
When durability trumps everything else, concrete wins. Concrete curbs and cast-in-place edging are the standard recommendation for driveways and any area exposed to snowplows or heavy loads, and they carry material costs of roughly $8 to $20 per linear foot before labor. That price reflects real permanence. Concrete doesn’t flex, doesn’t corrode, and doesn’t need re-anchoring the way plastic or metal eventually might.
5. Precast Kerb Stone and Soldier-Course Borders
These are the design-forward choices. A row of precast kerb stones or a soldier course of full pavers set on edge gives you a finished, upscale look that plastic and metal can’t match visually. But looks aren’t structure. For anything beyond a light-traffic garden bed, you need a solid compacted base beneath them and a hidden restraint behind them carrying the actual lateral load. Brick border material alone typically runs $6 to $15 per linear foot.
6. Compacted Aggregate Wedge and Permeable-Compatible Systems
For permeable paver installations, the edging has to tie into the base without interrupting drainage continuity. A compacted aggregate wedge or a rigid restraint anchored into the aggregate structure works because it preserves the base continuity permeable systems depend on. Shallow plastic restraints, common on standard patios, tend to undermine that continuity and are a poor match here.
7. Timber and Flat Landscape Edging
These aren’t structural options, and they shouldn’t be treated as one. Timber rots, especially in ground contact, and flat landscape edging is a frequent DIY mistake that leads to premature paver failure because it simply doesn’t have the stiffness to resist lateral creep. If you’ve got landscape edging installed around an existing paver patio right now, treat it as a temporary fix, not a permanent solution.
Matching Paver Border Ideas to Your Actual Use Case
The right edging depends less on personal taste and more on what’s driving over, walking over, or draining through your pavers.
Patios and walkways are the forgiving end of the spectrum. Well-anchored plastic handles most pedestrian traffic fine, and aluminum is worth the extra cost when you want tighter curves or a more refined finish near an entryway or pool deck. Neither needs to resist a vehicle, so you’re mostly solving for anchoring and appearance.
Driveways change the equation entirely. You’re now dealing with turning loads, parked-car weight, and in many climates, a snowplow blade catching the edge every winter. That calls for poured or reinforced concrete curbs, precast kerb stone, or heavy-duty metal embedded deep into the compacted base. Skipping straight to plastic here because it’s cheaper almost always costs more in repairs within a few seasons.
Permeable paver systems have one non-negotiable rule: the restraint has to be rigid and tied into the aggregate base, whether that’s a concrete curb or a properly anchored metal system. The base underneath permeable pavers is doing double duty, structural support and water management, and a weak edge restraint compromises both functions at once.
Long runs and snowplow-exposed edges deserve extra caution regardless of the primary use case. A hundred feet of plastic edging along a driveway apron will likely show damage within a couple of winters if plow blades clip it repeatedly. Concrete or reinforced metal units cost more upfront but avoid that repeat repair cycle.
A quick way to think about three common scenarios:
- Backyard patio, moderate budget: aluminum edging, mid-range cost, decades of service with minimal upkeep
- New driveway, long-term investment: concrete curb, higher upfront labor cost, essentially maintenance-free afterward
- Permeable walkway near a downspout: rigid restraint tied into the base, moderate cost, protects drainage function long term
Installation Rules That Actually Determine How Long Edging Lasts
Good material choice means nothing if the installation cuts corners, and edging is one of the easiest places for a DIY project to go wrong without anyone noticing until the following spring.
- Stake spacing matters more than stake count. Technical guidance calls for spikes roughly every 8 to 12 inches for plastic and aluminum restraints under typical residential loads. Heavier loads, looser soils, or tighter curves call for closer spacing, sometimes down toward the tighter end of that range or with wider stakes that grab more base material.
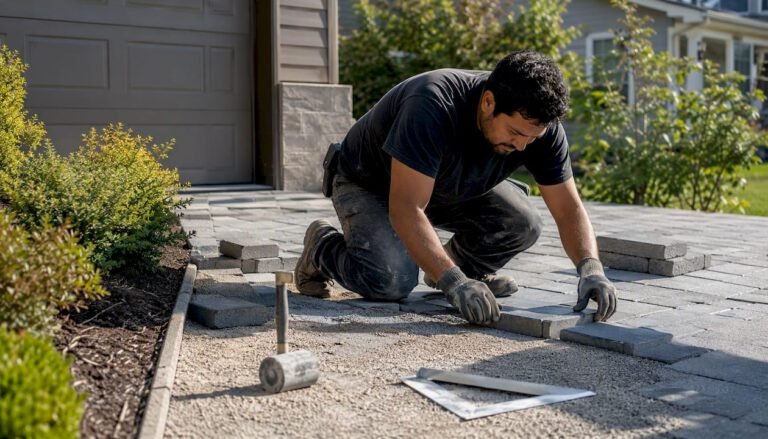
- Embedment has to reach the compacted base, not the bedding sand. Edge restraints sitting on top of the bedding layer are a setup for failure, because bedding sand is designed to settle and anything resting on it settles with it. Stakes need to punch through into the compacted aggregate underneath, where the ground actually holds still.
- Elevation controls how pavers settle. For sand-set installations, the paver top surface typically sits about a quarter inch above the restraint to allow for normal settlement without leaving a visible step. Some installers use the restraint itself as a screed reference during bedding, but it must be fixed permanently before final compaction, not left loose.
- Curves require the right material from the start. Flexible plastic or pre-bent aluminum handles gentle curves without kinking. Tighter radii sometimes call for cutting and overlapping segments, and it’s worth marking your cut pavers before setting the final restraint so the fit is exact rather than forced.
- Vehicular edges need a minimum cut paver size. Cutting a paver down to a sliver at the border leaves a piece too small to interlock properly under wheel loads, so plan your layout to avoid slivers at the edge wherever a vehicle will cross.
Pro Tip: If you’re hiring a contractor, ask specifically where the stakes will land relative to the base layer. A crew that can’t answer that clearly is probably setting restraints on bedding sand, and that shortcut is invisible until the edge starts creeping.
Common Installation Mistakes and When Repairs Are Enough
Most edging failures trace back to one of a handful of repeatable mistakes, and catching them early usually means a repair instead of a full replacement.
The biggest offender is substituting flat landscape edging for a real structural restraint. It looks similar at a glance, but it lacks the rigidity to resist creep under any meaningful load. Shallow staking is a close second: stakes driven only into topsoil instead of the compacted base give way the first time the ground freezes and thaws. Installing restraints directly on the bedding sand layer, rather than the base, rounds out the top three mistakes, along with skipping proper base compaction before anything goes in.
- Walk the perimeter once a year and after any freeze-thaw cycle to check for gaps or lean
- Inspect immediately after a heavy vehicle event or plow contact, since damage there is often sudden rather than gradual
- Minor creep can sometimes be corrected by re-anchoring existing restraints with fresh spikes
- More significant movement usually calls for replacing the restraint with a stiffer material, or adding a concrete curb behind it
If a permeable system starts showing edge movement, or if you suspect the base itself has failed rather than just the restraint, that’s a job for a professional. Base failures under permeable pavers affect drainage function, not just appearance, and misdiagnosing the cause tends to make cheap fixes expensive ones. Once pavers are down, a partner resource like TrueSealCoating’s paver care guidance is worth a look for keeping the surface itself protected between edge inspections.
Field Experience Behind This Guide
Pave-N-Turf installs artificial turf, landscape pavers, and decorative rock across driveways, patios, and pathways throughout the Dallas-Fort Worth and Austin areas, which means the edging failures described above aren’t theoretical. They show up on real properties, usually a year or two after a shortcut was taken during installation.
- Residential and commercial paver projects, including driveways, patios, and walkways
- Combined turf and hardscape installs where edging transitions between pavers and landscape elements
- A service record built on repeat local business and consistently high customer ratings
The edges homeowners regret skimping on are almost never the ones that fail in year one. They fail in year three, after the first hard freeze finds every shallow stake in the ground.
Guidance in this article draws on that installation experience alongside published technical standards, compiled by Everson.
How Sustainable Is Each Paver Edging Material
Material choice has a longer environmental tail than most homeowners consider before installation day.
Plastic edging is typically made from recycled HDPE, which gives it a reasonable sustainability story on the manufacturing side, but it’s not designed to be recycled again once it’s removed from the ground, and a failed installation means landfill waste sooner than a durable alternative would. Aluminum has a heavier manufacturing footprint upfront, but it’s fully recyclable and tends to stay in the ground for decades without replacement, which spreads that footprint over a much longer service life. Galvanized steel follows a similar pattern: energy-intensive to produce, but long-lived and recyclable at end of life.
Concrete sits in an interesting spot. It’s resource-intensive to produce and cement manufacturing carries a significant carbon cost industry-wide, but a properly installed concrete curb can outlast the driveway it borders, meaning it’s rarely replaced and rarely ends up as waste. Precast concrete and stone products generally beat poured-in-place on this front, since precasting reduces on-site material waste and allows for more efficient batch production.
The practical takeaway: the “greenest” edging isn’t necessarily the one with the lowest-impact raw material. It’s the one that survives long enough that you never have to install a replacement. A cheap plastic restraint that fails in two years and gets replaced twice often has a worse lifetime footprint than a single aluminum or concrete installation that lasts decades.
Edging and Drainage: Getting Water Management Right
Edging doesn’t just hold pavers in place. It shapes where water goes once it hits the ground, and getting that wrong undermines drainage systems that were otherwise designed correctly.
Standard sand-set paver installations rely on water shedding across the surface toward planted areas or drains, and most rigid edging materials, plastic, aluminum, steel, or concrete, work fine here as long as they don’t trap water against the base. A restraint set slightly too high can act as a dam, pooling water along the edge instead of letting it run off, which accelerates erosion right where you need stability most.
Permeable paver systems flip that logic. Water is meant to move down through the joints into an open-graded aggregate base rather than across the surface, so the edge restraint has to preserve continuity with that base rather than sealing it off. A solid concrete curb poured incorrectly, one that blocks lateral water movement within the base layer, can undermine the entire permeable design even if the pavers themselves are installed perfectly. This is exactly why rigid, base-anchored restraints designed for permeable systems differ from standard driveway curbs, even though both look similar above ground.
If your project sits near a downspout, low spot, or existing drainage swale, it’s worth mapping water flow before choosing edging material, not after. An edging choice that looks fine on a dry day can quietly redirect runoff toward a foundation or neighboring property once a real storm hits.
Tools You’ll Need for Each Edging Installation
The tool list changes meaningfully depending on which edging family you’re installing, and having the wrong one on hand is the fastest way to turn a Saturday project into a weekend one.
For plastic and aluminum edging, you’ll want a rubber mallet or hammer for driving spikes, a stake driver or heavy-duty spike set matched to the manufacturer’s spacing recommendation, tin snips or a hacksaw for cutting sections to length, and a compactor, plate or hand tamper, for the base beneath the restraint. A chalk line or string line helps keep long runs straight before you start staking.
Galvanized steel edging demands more muscle: a heavier mallet or small sledge, metal-rated stakes, and often a angle grinder with a metal cutting wheel for clean cuts at corners or transitions. Gloves matter more here than with plastic, since cut steel edges are sharp.
Concrete curbs, whether poured-in-place or precast, need the most substantial toolkit: forms or edge templates for pour work, a concrete mixer or delivery arrangement for larger runs, rebar and tie wire if reinforcement is called for, a screed board, and finishing trowels. Precast units instead need a solid base prep kit, compactor, level, and construction adhesive or mortar for setting each section.
Across every material, a few tools show up regardless of type: a 4 foot level for checking elevation consistency, a rubber mallet for seating pavers against the finished restraint, and a base compactor that never gets skipped, since even the stiffest edging fails early on a poorly compacted foundation.
What This Guide Gets Right That Most Advice Skips
Most edging content ranks materials by price or curb appeal, plastic cheap, concrete expensive, pick your budget. That framing misses the actual decision homeowners need to make, which is about load, not aesthetics. A driveway apron and a garden path can use the exact same paver on top and need completely different restraints underneath.
The conventional advice also underweights installation quality relative to material choice. A premium aluminum system with stakes driven eight inches into loose topsoil will fail faster than a basic plastic restraint anchored properly into a compacted base. The material gets the credit or blame, when the base prep and stake depth usually deserve it.
If there’s one thing worth prioritizing above all else, it’s this: confirm where the restraint sits before you argue about what it’s made of. Ask a contractor to show you the compacted base before pavers go down. Check stake depth before deciding a material “failed.” Get that foundation right, and most of the material debates become far less consequential than the marketing around them suggests.
— Everson
Get Professional Paver Edging Installed by Pave-n-turf
Reading through stake spacing and base compaction rules is one thing. Getting them right on your own driveway, with the right equipment and the correct restraint for your specific load, is another. Pave-n-turf handles that gap directly for homeowners across the Dallas-Fort Worth and Austin areas, installing paver patios, walkways, and driveways with edge restraints matched to the actual use case, not a one-size-fits-all default.

That means a driveway gets concrete curbing or heavy-duty metal set into a properly compacted base, while a backyard patio gets a lighter, faster install without paying for structure it doesn’t need. If your project also includes landscape turf or decorative rock accents around the paved area, that work gets planned together instead of as separate afterthoughts. If you’re ready to stop guessing at stake depth and get a quote for your specific site, reach out to Pave-n-turf to schedule a walkthrough.
Sources
- Landscape Edging vs Paver Edging: Pros and Cons Explained
- Edge restraint options and guidance (PAV TEC technical note)
- Installing paver edge restraints (Unilock)
- Edge Restraints: The differences, pros and cons (Polycor course)
FAQ
What type of edging is best for pavers?
It depends on load: plastic or aluminum works well for patios and walkways when anchored into the compacted base, while driveways and permeable systems need reinforced concrete curbs or heavy-duty metal.
What to use as a border for pavers?
A structural restraint, plastic, aluminum, steel, or concrete, carries the actual lateral load, while decorative borders like soldier-course pavers or precast kerb stone add visual appeal on top of that hidden restraint.
What is the 3 inch edging rule?
There’s no universally standardized “3 inch rule” in the technical guidance reviewed here; installation specifics like embedment depth and stake spacing vary by material and manufacturer, so check the specific product’s installation instructions rather than relying on a generic rule.
What are some ideas for edging pavers?
Beyond standard plastic or aluminum restraints, homeowners often use precast kerb stone, soldier-course borders, or aluminum edging bent into curves for a more finished look, always backed by a proper structural restraint underneath.
Can I install paver edging myself, or should I hire a contractor?
Plastic and aluminum edging on a straightforward patio is a reasonable DIY project if you follow stake spacing and base embedment rules closely. Driveways, permeable systems, or any project involving concrete curbs are better handled by a professional installer like Pave-n-turf, given the base preparation and reinforcement involved.