DIY Homeowners: 10 Step Plan to Build an Outdoor Kitchen on Pavers
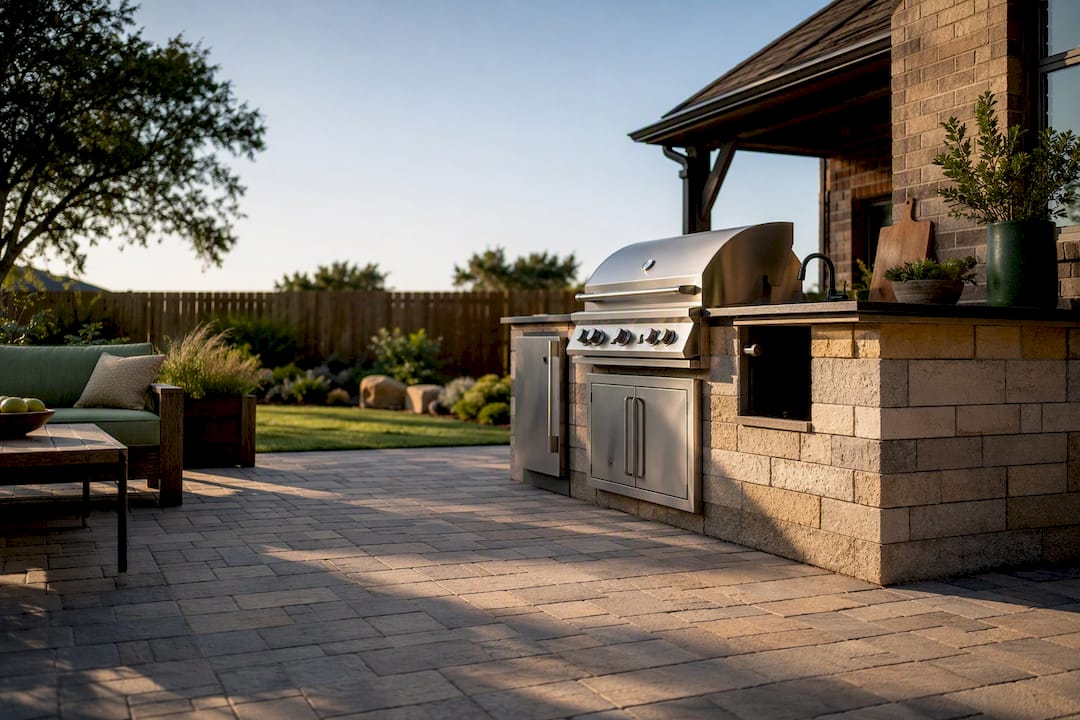
Yes, pavers work well for outdoor kitchens when the base beneath them is built correctly. The two things that make or break the project are foundation depth (heavy appliances need more than a standard patio base) and utility planning, since gas, electrical, and drainage lines have to be routed and code-checked before you lay a single stone.
TL;DR:
- Proper excavation depth of 8 to 14 inches is essential for supporting heavy appliances and preventing uneven settling within a year or two.
- A hybrid foundation with concrete footings under heavy fixtures combined with pavers elsewhere offers optimal strength and flexibility.
- Utility planning must be completed before laying pavers, with licensed professionals handling gas, electrical, and drainage work to meet safety codes.
- Water drains effectively through paver joints into the gravel base, but correct grading and waterproof jointing are critical to resist frost and washout.
- For heavy masonry, isolated concrete footings are recommended, and existing patios should be checked for stability and locking pavers before adding appliances.
Table of Contents
- Why Choose Pavers Over Concrete for an Outdoor Kitchen
- Foundation Requirements for a Kitchen on Pavers
- How Much Weight Can a Paver Kitchen Handle?
- Gas, Electrical, and Plumbing Planning for Outdoor Kitchens
- Drainage and Freeze-Thaw Performance
- Layout and Clearances That Make a Paver Kitchen Work
- Best Paver Materials and Finishes for Outdoor Kitchens
- Installation Checklist From Site Prep to Final Inspection
- Maintenance and Fixing Common Paver Problems
- Pave-N-Turf Field Notes: What We See on Real Installs
- When to DIY and When to Call in a Pro
- Get a Professional Base Built Right the First Time
- Sources
- FAQ
Why Choose Pavers Over Concrete for an Outdoor Kitchen
Pavers flex with minor ground movement instead of cracking, and they let you pull up a single unit to fix a problem without breaking out a jackhammer. A properly built paver base performs as well as a concrete pad for most prefab and modular outdoor kitchens, and it typically drains better in wet climates because water moves through the joints into the gravel below instead of pooling on top. Concrete still wins for one scenario: extremely heavy masonry builds, like a full brick pizza oven, where a monolithic slab resists shifting better than a modular surface.
That’s why many pros use both. A hybrid approach puts isolated concrete footings under the heaviest fixtures while pavers finish the rest of the surface, giving you the strength you need exactly where you need it.
- Pavers: lower upfront cost, DIY-repairable, better drainage, natural expansion joints
- Concrete: stronger under concentrated masonry weight, but permanent and prone to visible cracking through freeze-thaw cycles
- Hybrid: concrete footings for ovens or islands, pavers for the walking and dining surface
Foundation Requirements for a Kitchen on Pavers
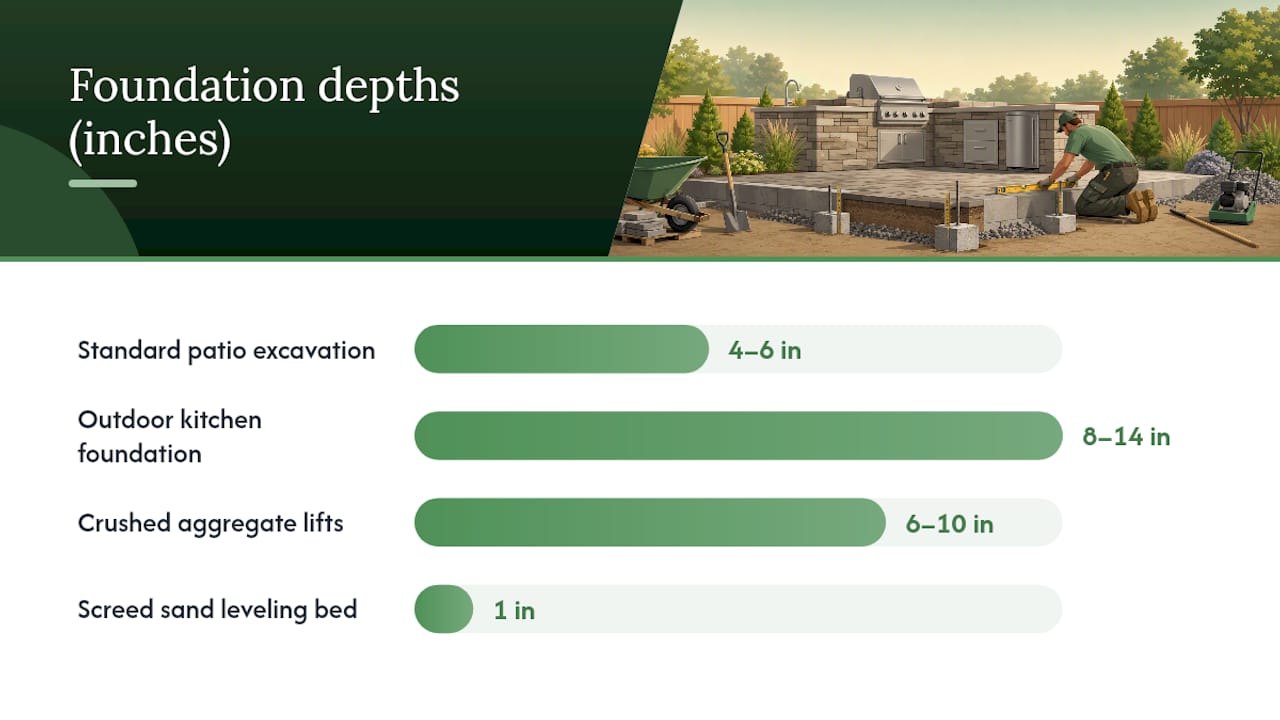
A standard patio base won’t cut it once you add a grill island, a refrigerator, or a stone counter. Standard patios often need only 4 to 6 inches of excavation, but outdoor kitchen foundations typically require 8 to 14 inches to fit a proper load-bearing base. Skimping here is the single most common reason a paver kitchen settles unevenly within a year or two.
Build the base in this order:
- Excavate to depth and lay geotextile fabric if your soil drains poorly.
- Add crushed aggregate in compacted lifts, targeting 6 to 10 inches for heavy appliance zones.
- Compact each lift with a plate compactor rather than dumping it all at once.
- Screed a 1-inch bed of coarse sand as your leveling layer.
- Set pavers rated for the load, then install rigid edge restraints on all open sides.
Insufficient depth and poor compaction remain the primary cause of long-term settling under paver installations, even more than material choice.
Pro Tip: Run the plate compactor over each lift until you stop seeing it sink. If your boot heel leaves a visible print after compaction, the lift needs another pass before you add the next one.
For the exact aggregate specs and lift sequencing, our paver base requirements guide breaks down depth by soil type.
How Much Weight Can a Paver Kitchen Handle?
Grill islands, refrigerators, and stone counters don’t spread their weight evenly. The load concentrates under cabinet feet and corner posts, which is exactly where a thin or poorly compacted base fails first.
- A loaded grill island with stone veneer can weigh several hundred pounds concentrated on a small footprint.
- Pizza ovens and heavy masonry islands often need isolated concrete footings poured below the paver base rather than relying on compacted gravel alone.
- If you’re building on an existing patio, check that the pavers are locked, level, and free of movement before adding anything heavy; some retrofits require pulling up sections to pour footings underneath.
- Watch existing patios for early warning signs: hollow-sounding pavers, visible dips, or sand washing out between joints.
If you’re retrofitting an older patio, our guide on installing pavers over concrete covers when that base is solid enough to build on.
Gas, Electrical, and Plumbing Planning for Outdoor Kitchens
Utilities are where DIY outdoor kitchens go wrong fastest, and they’re the one area where hiring a licensed pro isn’t optional in most jurisdictions. Gas lines fall under NFPA 54, electrical work follows the National Electrical Code (NFPA 70), and drainage routing follows the International Plumbing Code. Plan these before you finalize your layout, not after.
- Outdoor circuits need GFCI protection at every outlet near water or cooking surfaces.
- Grills and side burners need gas lines sized correctly, with flexible connectors rated for outdoor use.
- Sinks need drainage routed to a proper connection point, not just a hole in the pavers.
Most municipalities require a permit and inspection for gas and electrical hookups, even on a backyard project. Hire a licensed plumber or electrician for the final connections. The base and layout are DIY-friendly; the utility hookups usually aren’t.
Drainage and Freeze-Thaw Performance
Paver joints do more work than most homeowners realize. Water moves through them into the gravel base below, which prevents the standing puddles that plague poorly graded concrete slabs. The tradeoff is that your grading has to be correct from day one, since pavers can’t fix a slope problem the way a poured slab sometimes can.
- Use polymeric sand in the joints to resist washout and cut down on weed growth between pavers.
- Sealing is optional and mostly a cosmetic choice tied to the finish you want.
- In colder regions, go deeper on the aggregate base, add geotextile fabric, and use polymeric jointing to resist frost heave through winter freeze-thaw cycles.
Layout and Clearances That Make a Paver Kitchen Work
A beautiful outdoor kitchen still fails if the workflow is bad or the safety clearances are wrong. Keep your grill’s manufacturer-specified clearances in mind, and as a general rule, keep grills at least 10 feet from combustible structures like wood fencing, siding, or overhangs unless your manufacturer’s manual says otherwise.
- Maintain a clear walking path of at least 36 inches around the cook zone.
- Design a simple work triangle between prep counter, grill, and seating so nobody’s crossing paths mid-cook.
- Choose flat, tightly jointed pavers for the cook zone. Uneven surfaces cause wobble under rolling carts and make cleanup harder.
- If you’re building near a pergola or roof structure, check clearance requirements before you pour a single footing.
If your layout includes a fire feature near the kitchen, our fire pit clearance guide covers spacing rules that overlap with grill safety.
Best Paver Materials and Finishes for Outdoor Kitchens
Not every paver holds up the same way near heat, grease, and grill splatter. Concrete pavers are the most budget-friendly and come in the widest range of finishes. Clay brick handles heat well but chips more easily under dropped cookware. Natural stone looks premium but is more porous, so it stains faster near a grease zone. Porcelain resists staining better than any of them but costs more and needs a precise, well-compacted base to avoid cracking.
- Use polymeric sand in food-prep zones to resist grease staining in the joints.
- Choose a stain-resistant sealer if you’re using natural stone near the cook area.
- Pair your surface with a noncombustible, low-porosity countertop like sealed concrete or granite, never a wood or laminate finish near heat.
Our guide to choosing the best pavers walks through finish options by climate and traffic level.
Installation Checklist From Site Prep to Final Inspection
Work through these steps in order, and don’t skip the inspection points even if you’re confident in your compaction.
- Mark utility lines and confirm no conflicts with your planned dig zone.
- Excavate to 8 to 14 inches depending on appliance load.
- Lay geotextile fabric over poor-draining soil.
- Add aggregate in 2 to 3 inch lifts, compacting each pass.
- Pour isolated concrete footings under ovens or heavy masonry if needed.
- Screed a 1-inch sand bed across the compacted base.
- Lay pavers with consistent joint spacing.
- Apply polymeric sand and install rigid edge restraints.
- Rough in gas, electrical, and drainage lines before final appliance placement.
- Schedule inspection for utility connections before closing everything up.
Maintenance and Fixing Common Paver Problems
A paver kitchen needs less upkeep than a lawn, but not zero. Sweep debris regularly, top off polymeric sand every couple of years as it wears down, and reseal natural stone if you notice staining creeping in near the grill.
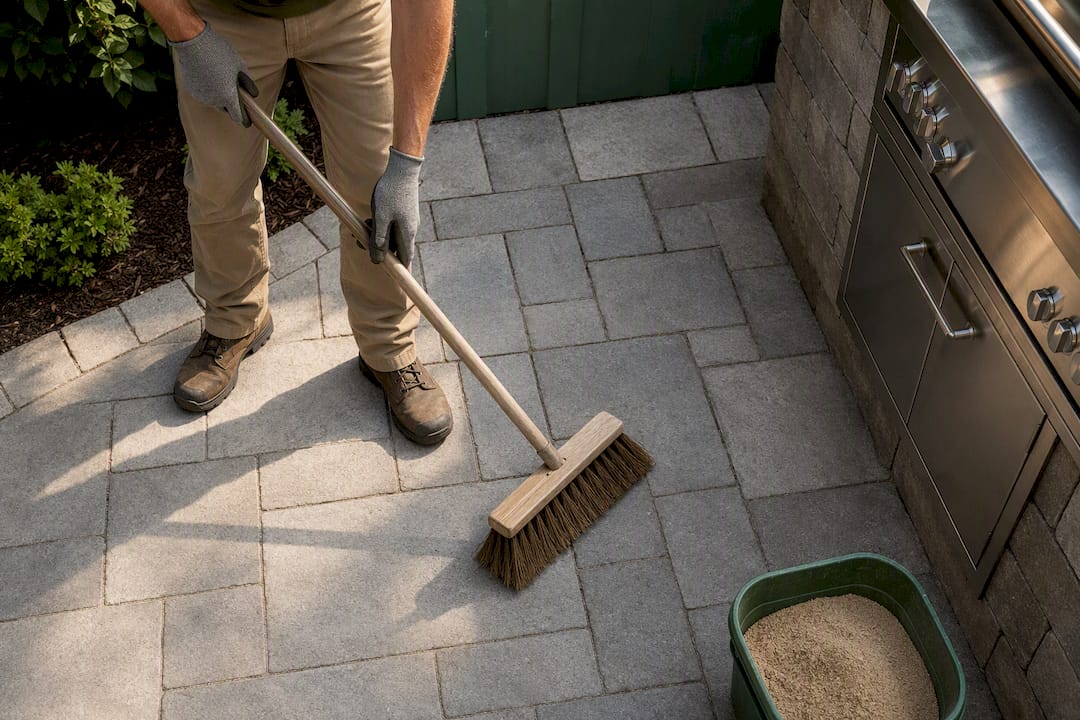
Small settling is usually a quick fix: lift the affected pavers, add and compact more aggregate underneath, then reset them. If you see the same spot sink again within a season, that’s a sign the base itself needs professional remediation rather than another patch job. For deeper cleaning steps and sealing frequency, see our paver cleaning and sealing guide.
Pave-N-Turf Field Notes: What We See on Real Installs
On kitchen installs, we typically recommend going deeper on the aggregate base than a standard patio calls for, and we add isolated concrete footings under anything heavier than a standard grill cart. The most common mistake we see is shallow excavation paired with skipped edge restraints, which lets the whole system shift sideways over time.
Pro Tip: If your contractor can’t tell you the exact aggregate depth and compaction target before digging starts, get a second opinion before signing anything.
When to DIY and When to Call in a Pro
If your project is a grill cart and a simple counter, a careful DIYer with a plate compactor can handle it. Once you’re adding a pizza oven, a full masonry island, or new gas and electrical lines, get a site assessment first. That single walk-through catches base and utility problems before they become expensive fixes.
— Everson
Get a Professional Base Built Right the First Time
If you’d rather skip the guesswork on excavation depth and compaction targets, Pave-N-Turf builds paver bases specifically engineered for outdoor kitchen loads across the Dallas-Fort Worth area, not just standard patio depth.

Our crews handle site evaluation, aggregate base construction, paver installation, and decorative rock accents around the finished kitchen, so you get one team responsible for the whole surface instead of guessing where a DIY job might fall short. An on-site assessment tells you exactly how deep your base needs to go, whether your layout needs isolated footings, and how your existing patio (if you have one) holds up under the added weight. Check out our landscape paver services to see project examples and schedule a site visit for your outdoor kitchen build.
Sources
- Betterpatio
- Paver vs Poured Concrete for a DIY outdoor kitchen base – Journeyman HQ
- Can I Put an Outdoor Kitchen on my Paver Patio? – RTA Outdoor Living
- Grill safety guidance – Chubb
FAQ
What is the most affordable way to cover an outdoor kitchen?
A cantilevered umbrella or a simple wood pergola with a shade cloth is typically the cheapest cover option, though neither replaces the manufacturer-required clearance from your grill.
What are the outdoor kitchen trends for 2026?
Compact modular kitchens built directly onto paver systems are gaining ground because they cost less to install than full masonry builds and remain easy to reconfigure later.
Can I grill on patio pavers?
Yes, as long as the paver surface is level, stable, and set back from combustible structures per your grill’s manual, generally at least 10 feet from fencing, siding, or overhangs.
Can you build an outdoor kitchen on top of a deck?
Only with significant structural reinforcement, since most residential decks aren’t rated for the concentrated weight of appliances and stone; a paver base on solid ground is almost always the simpler and safer route.