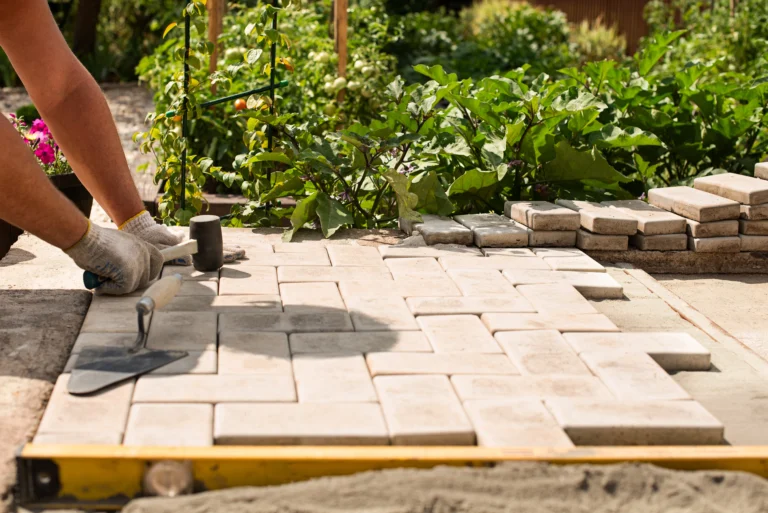
Driveway Border Pavers: Types, Layouts and Installation

A driveway border does two jobs. It frames the drive so it looks finished, and it holds every paver in place so the surface does not creep apart under your tires. The best borders do both: a visible band of contrasting pavers on top, backed by a hidden edge restraint that does the structural work. This guide covers the border layouts people actually choose, the edging options behind them, how a stable edge gets built, and what drives the price.
TL;DR
- A border is the look. An edge restraint is the structure. A paver driveway needs a restraint on every open edge, whatever the border looks like.
- Popular layouts are the soldier course, the sailor course, double or triple rows, and banding inside the field of the drive.
- Restraint options include precast concrete, poured concrete, plastic, aluminum, steel and cut stone. Concrete is the heavy-duty choice for vehicle loads.
- Edge stability depends on the compacted base. The aggregate base should extend at least 6 inches past the restraint.
- Be wary of a bid far below the others. The savings usually come out of base prep and the edge.
Table of Contents
- What driveway border pavers actually do
- Border layouts that work on a driveway
- Driveway edging pavers and restraints: your options
- How a stable driveway edge gets built
- Don’t forget drainage
- What it costs, and why bids differ
- Perspective: what we see on DFW driveways
- Keeping your border looking good
- Pairing your border with turf, rock and other features
- Work with us on your driveway border
- FAQ
- Sources
What driveway border pavers actually do
Let’s be real: most people searching this want one of two things. Either they want the driveway to look sharp, or they have seen pavers shifting at the edge and want to stop it. The good news is that one well-built border handles both.
Interlocking pavers work because they lock against each other. That lock only holds if the outer pieces can’t slide away. The Concrete Masonry & Hardscapes Association explains that edge restraints hold interlocking concrete pavers together and prevent spreading under horizontal traffic forces. A car turning its wheels, braking, or pulling in at an angle pushes sideways on the surface. Without a restraint, the outer pavers drift, joints open, and the pattern loosens.
So think of the border in two layers:
- The decorative border. Pavers set in a contrasting color, size or direction that frame the drive.
- The edge restraint. The structural piece, usually out of sight, that keeps the whole field from spreading.
A border that looks great but has no restraint behind it is the most common reason a driveway starts to wander in a few years.
Border layouts that work on a driveway
A border is a design choice, and a driveway gives you a lot of room to play. A few layouts cover most of what homeowners ask for.
Soldier course
Pavers laid end to end with their short ends facing the drive, like a row of soldiers standing at attention. It reads as a clean, formal outline. It is also forgiving: it follows gentle curves well when the joints are managed.
Sailor course
Pavers turned on their long edge so the long side runs along the drive. You get a thinner, more continuous line. It suits modern homes and straight drives.
Double or triple rows
Wider borders in contrasting colors or finishes give the drive a strong frame. Unilock’s design guidance suggests contrasting soldier or sailor courses and double or triple-wide border rows, and notes borders can pair with lighting or gate structures. A wide border also visually shrinks a big drive and makes a long one feel intentional.
Banding inside the field
A band, sometimes called a ribbon, runs through the drive itself. It can mark where the parking pad starts, line up with the garage door, or break up a wide expanse of one color. You can combine a perimeter border with one or two inner bands for a layered look.
Practical design tips
- Pick contrast you can live with. A border two shades off the field looks refined. A dramatic contrast shows every oil spot and leaf stain.
- Match your house. Pull the border color from the roofline, brick, trim or front walk.
- Keep it in proportion. On a narrow drive, a single course looks better than a triple row that eats the width.
- Plan the corners and curves. Tight curves are where cuts multiply. A good installer will sketch these before any pavers go down.
- Think about function. Unilock notes borders can define parking zones, protect driveway edges, add texture for traction and buffer against snowplow damage in colder climates. In the DFW area, the zoning and edge protection are the parts most homeowners care about.
Driveway edging pavers and restraints: your options
When people search “driveway edging pavers,” they are often asking about the restraint, the piece that does the holding. CMHA lists precast concrete, plastic, cut stone, aluminum, steel and poured-in-place concrete among the restraint options. CMHA also notes that poured-in-place concrete curbs, or combined curb and gutters, make suitable restraints.
Here is how the main types compare for a driveway, where vehicle loads are much heavier than on a patio.
| Restraint type | Best for | Strengths | Watch out for |
|---|---|---|---|
| Poured concrete curb or edge | Driveways with regular vehicle traffic | Heavy, deep, permanent | Needs forming and curing time; cracks if the base under it is poor |
| Precast concrete edge | Straight runs and clean lines | Solid, uniform look | Joints between units; needs a stable base |
| Plastic edge restraint | Lighter-duty areas, walkways, patios | Flexible on curves, low profile | Relies on spikes and compacted base; not the first pick for heavy driveway use |
| Aluminum or steel edging | Curves and tight lines | Smooth, thin vertical face against pavers | Needs proper anchoring; L-shaped profiles add stability |
| Cut stone | Upscale looks | Attractive and durable | Higher labor; consistent sizing matters |
There is a real trade-off here. Plastic is easy and widely used, and the Interlocking Concrete Pavement Institute does publish a residential driveway detail using either a troweled concrete edge restraint or a plastic edge restraint. The point of that drawing is that the visible paver border is backed by a structural restraint. For a driveway that sees daily vehicle traffic, a concrete restraint is the more conservative choice, and it is the one we usually talk through first with homeowners.
Do you need a visible concrete curb?
Not always. Many drives hide the concrete restraint behind the last row of pavers or under the surrounding soil, turf or rock, so you see only the border. That is one reason a border with a hidden restraint looks so clean. Where the drive meets lawn, a poured edge buried just below grade lets soil or artificial turf butt up against it without a visible seam.
How a stable driveway edge gets built
The border is only as good as what is under it. This is the part a quote rarely spells out, and it is where bids diverge.
1. Excavate and prepare the subgrade
The crew removes grass and soil to the depth the design calls for, shapes the slope so water leaves the drive, and compacts the soil underneath. If your soil is silt or clay, geotextile fabric can help. The Interlocking Concrete Pavement Institute says geotextile can separate and confine the aggregate base, prevent soil migration that weakens the base, and extend base life, and it recommends considering it especially over silt or clay soils.

2. Build the aggregate base in compacted layers
The base is crushed stone, placed and compacted in lifts. Stone size matters. ICPI reports that ASTM No. 2 stone provides better support for heavier repetitive loads than No. 57 stone, which is why driveways are built with a thicker, coarser base than patios. Ask your installer what stone and what thickness they plan to use, and why.
3. Extend the base past the edge
This is the detail that separates a solid edge from a failing one. CMHA’s installer study guide says it is critical that the base aggregate extend at least 6 inches past the edge restraint to give it structural support. If the base stops right at the restraint, the restraint has nothing to lean on.
4. Set the restraint
The same guide describes placing the edging directly on the compacted base and using the manufacturer-recommended spikes to anchor it. Poured concrete restraints are formed and placed on the prepared base before the paver field is finished.
5. Lay the pavers and the border
The installer screeds bedding sand, lays the field and the border in the chosen pattern, and cuts the edge pieces to fit. Cuts along a curved edge are where skill shows. Pavers cut too small at the border can chip or shift first, so installers plan the layout to avoid slivers.
6. Compact carefully
Compaction locks the pavers, but it can also push an unrestrained edge out. CMHA’s guide says compactors should not operate within 6 feet of unrestrained edges during construction to prevent premature shifting or separation. A crew that knows this will restrain the edge first and then compact.
7. Fill the joints and finish
Joint sand goes in, the surface is compacted again and swept, and the surrounding soil, turf or rock is brought up against the border to support it from the outside.
Don’t forget drainage
A beautiful border can still fail if water sits against it. Water that pools along the edge softens the base and invites movement. The drive should slope so water leaves it, and the border should never act like a dam. If you want to go deeper, we cover how to plan, build and fix paver driveway drainage in a separate guide. If the border continues into a front walk, the same logic applies to paver walkway drainage.

What it costs, and why bids differ
We don’t publish fixed prices for borders, because the number depends on your site. A border is priced by the linear foot of edge, and these things move the total:
- Length and shape. Long straight runs are efficient. Curves and corners mean more cuts and more time.
- Border width. A single course costs less than a double or triple row.
- Paver material. Concrete pavers sit at the economical end. Natural stone costs more.
- Restraint type. Poured concrete takes forming and curing. Plastic and metal are quicker to set.
- Base and excavation. Deeper excavation, more stone, geotextile and drainage work all add cost.
- Retrofitting. Adding a paver border to an existing concrete drive means cutting and setting pieces into an existing slab, which is slow, labor-intensive work.
- Access and removal. Hauling away old material and getting equipment to the site affect the price.
When you compare quotes, compare scope, not just the bottom line. Ask each contractor what base depth, what stone, what restraint and what drainage work is included. A bid that comes in far below the rest often saves money in the places you can’t see after the job: base compaction and the edge restraint. Those are exactly the stages that decide whether the border still looks good in five years.
Perspective: what we see on DFW driveways
As a veteran-owned installer of pavers, decorative rock and artificial turf across Dallas-Fort Worth, we see a pattern. Homeowners spend most of their attention on color and pattern, and they should enjoy that choice. But the driveways that hold up are the ones where the conversation also covered the base and the edge.
Our advice is simple:
- Decide how the border will meet the rest of your yard first. Turf, rock and soil each sit differently against a paver edge, and it is easier to plan the transition up front than to fix it later.
- Treat the restraint as non-negotiable. A driveway is a working surface.
- Keep the design simple. One clean contrasting course often looks better than a busy pattern.
- Ask to see how your installer handles the corners and curves. That is where craftsmanship shows.
We would rather explain a detail you can’t see than let you find out about it in a few years.
— Everson
Keeping your border looking good
Paver driveways are low-maintenance, not no-maintenance. CMHA notes that interlocking concrete pavements occasionally require maintenance to deliver peak performance. The routine is short:
- Clean and sweep. Remove leaves, dirt and debris, and rinse oil or stains early.
- Look for problem spots. CMHA’s guide describes maintenance as cleaning, identifying problem areas and repairing them. Check the border for dips, gaps, or pavers sitting higher or lower than their neighbors.
- Refill joint sand where it has washed out.
- Fix small problems early. A few lifted pavers can be reset. If you wait, water gets under the surface and the repair grows.
- Sealing is optional. The same guide says sealing is not required for paver integrity and is not permanent, so follow the manufacturer’s instructions if you choose to seal for color or stain resistance.
If you own rental or investment property, a regular inspection schedule keeps small paver issues from becoming tenant complaints. A guide to managing rental property maintenance can help you build that routine across the whole property, driveway included.
Pairing your border with turf, rock and other features
The border is often the line where one part of your landscape ends and another begins. A paver border next to a driveway can transition cleanly into artificial turf, decorative rock, a walkway or steps. Our turf and paver backyard ideas show how those pieces fit together in Texas yards, and our guide to paver steps installation covers the next step if your drive leads up to an entry.
Work with us on your driveway border
If you want a driveway border built with the base and the restraint done right, that is what we do. Our team installs landscape pavers for driveways, patios, pathways and parking areas across Dallas-Fort Worth, and we can tie them into turf or decorative rock so the whole yard works together. Our customers rate us highly on Google and Yelp, and we are happy to walk your property and talk through layout, restraint and drainage before you commit to anything.

To get started, contact Pave-N-Turf and tell us about your drive.
FAQ
What is paver edging called?
The structural piece is usually called an edge restraint. The decorative row of pavers on top is called a border, and depending on how the pavers are laid it may be a soldier course or a sailor course. Contractors often use “edging” loosely for both, so ask which one a quote covers.
What are the different types of paver edging for a driveway?
Common restraint options include precast concrete, poured-in-place concrete, plastic, aluminum, steel and cut stone. For a driveway that carries vehicles every day, a concrete restraint is the sturdier choice. Lighter plastic and metal products are more typical on patios and walkways.
Can I add a paver border to an existing concrete driveway?
Yes, it can be done, but it is more work than building a border into a new drive. Pavers have to be cut and set against the existing slab, and the edge needs proper support. Expect the labor to be a bigger share of the price than the materials.
Do driveway border pavers need to be sealed?
No. Sealing is not required for paver integrity and it is not permanent, so it is a cosmetic choice. If you do seal, follow the manufacturer’s instructions for your pavers.
Why do some paver driveway edges shift or separate?
Usually because the edge was not restrained, or the base was not compacted and extended past the restraint. Water pooling at the edge can make it worse. Resetting the pavers without fixing the cause only buys time, so have a professional look at the base.
Sources
- Edge Restraints for Interlocking Concrete Pavements, CMHA
- CMHA exam blueprint, study guide and references (2023)
- The Use of Geotextile in Permeable Pavement, ICPI
- Paver Patio Points, ICPI
- Residential driveway with troweled concrete edge restraint, ICPI
- Paver Border, Banding, and Accent Design Ideas, Unilock